Iterative plugins API
Introduction / What is it for?
The iterative functionality in Savu provides a way to run a plugin (or a group of plugins) multiple times in sequence, without the need to manually create multiple instances of the plugin(s) in the Savu configurator. In other words, this feature provides the ability to easily define iterative loops in Savu process lists.
This can be useful for neatly representing in Savu different kinds of processing pipelines that involve repeated applications of a single plugin, or multiple plugins, such as Emulating 3D denoising, or Iterative alignment reconstruction algorithm.
Setting iterative plugins
Adding iterative loops
An iterative loop can be defined in a process list by providing a few pieces of information to the Savu configurator:
the plugin indices that mark the start and end of the iterative loop
the number of iterations to perform
This can be done with the command iterate --set a b n, where
ais the index of the plugin where the loop should startbis the index of the plugin where the loop should endnis the number of iterations to perform
For example, to iterate a single plugin with index 3 a total of 5 times, run
iterate --set 3 3 5.
As another example, to iterate from plugin index 3 to plugin index 4 a total of
5 times, run iterate --set 3 4 5.
Removing iterative loops
Iterative loops are numbered inside the configurator starting from 1. This
labelling can be viewed with the command iterate.
To remove a loop (or multiple loops), pass the number label for the loops to the
command iterate --remove.
For example, to remove a loop with the label 1, run iterate
--remove 1.
As another example, to remove two loops, one with label 1 and another with
label 2, run iterate --remove 1 2.
Additionally, all loops in the process list can be removed by running
iterate --remove and then confirming the action when prompted.
Viewing all iterative loops
As mentioned above, all loops and their associated information (number label,
start index, end index, number of iterations) can be viewed with the
iterate command.
Examples:
Here we provide two examples how iterative plugins can be used in Savu.
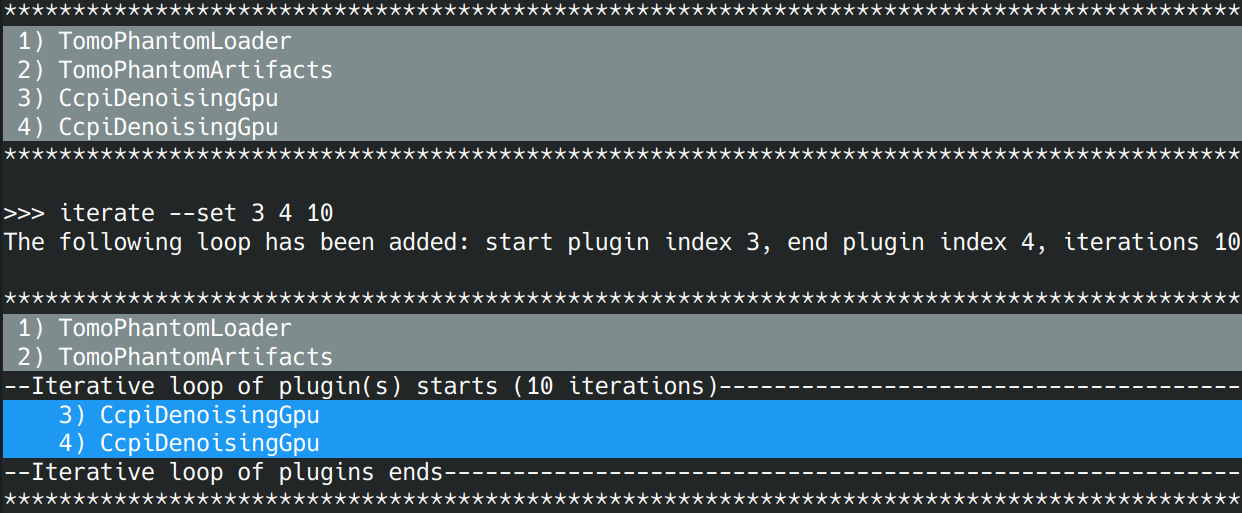
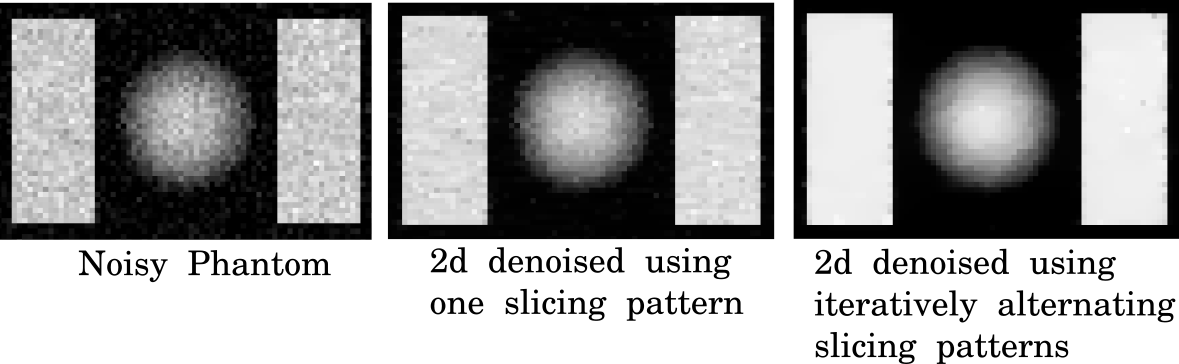
Emulating 3D denoising
One can build a case where 2D denoising methods changing slicing patterns alternatingly in iterations thus enabling a much smoother recovery from noise. In image bellow we demonstrate how plugins no. 3 and 4 can be converted to be iterative. Using command iterate –set 3 4 10, plugins no. 3 and 4 have different slicing patterns and locked in an iterative loop of 10 (global) iterations. The result of denoising in this case is more consistent in every spatial direction than using one dimension. This filtering, although 2D, emulates 3D denoising.
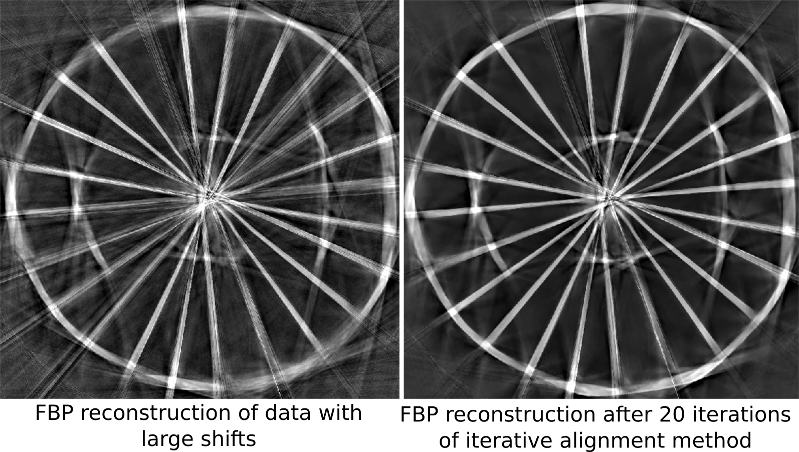
Iterative alignment reconstruction algorithm
This approach to reconstruct misaligned data is based on an iterative refinement with re-projection in order to perform a simultaneous reconstruction and alignment, see the paper: Rapid alignment of nanotomography data using joint iterative reconstruction and reprojection.
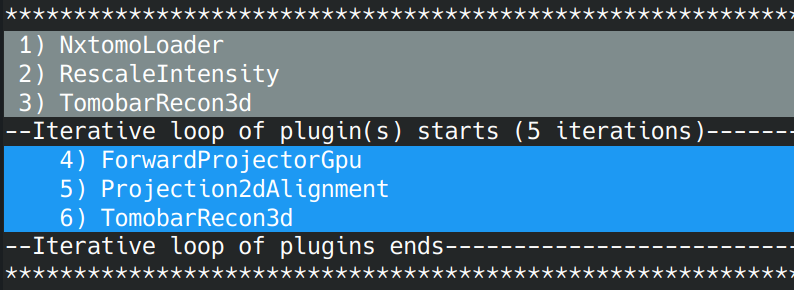
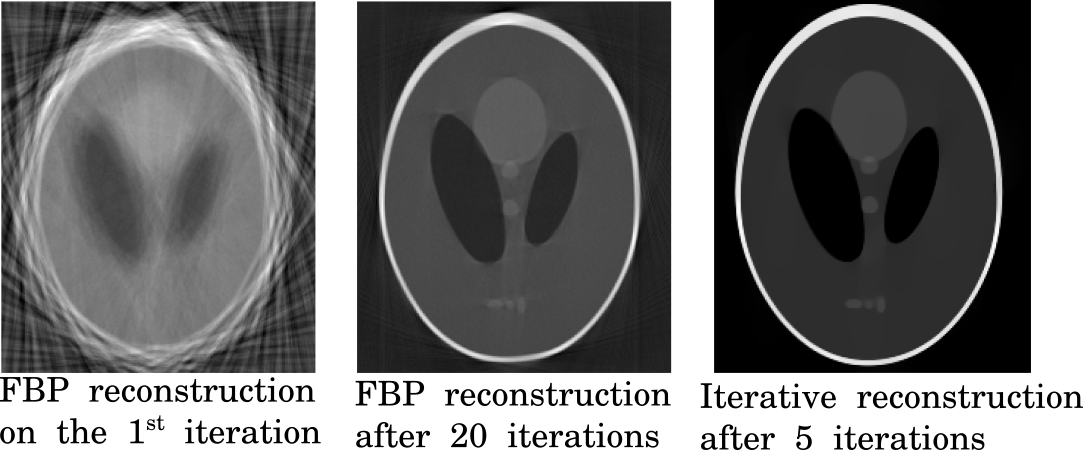
With iterative plugins API it is possible to build the following iterative pipeline which will enable the iterative alignment algorithm. Plugin no. 3 performs re-projection of the reconstructed image, no.4 initialises a registration method to perform alignment of the re-projected data with the original raw data in projection space and no.5 reconstructs the corrected projection data. Note that different reconstruction algorithms can be used to reconstruct the corrected data, e.g. it could be the FBP algorithm of the AstraReconGpu plugin or 3D reconsutrction algorithms (some ASTRA-wrapped) of the ToMoBAR package (TomobarRecon3d plugin). One can also use the regulairised iterative reconstruction from the ToMoBAR package which can converge faster and usually delivers a superior reconstruction, if the computation time is not the essence (see the images).
Two implementations of iterative alignment
One implementation is based on the implementation in TomoPy, where the projections are shifted. The other implementation is a variation, based on the idea of using the x and y projection shifts to translate the source and detector using 3D vector geometry during the reconstruction process that occurs in the iterative loop.
1. An explicit registration of projections (follows TomoPy implementation)
This implementation should be preferred if the misalignment shifts are significant (e.g. more than 10 pixels).
In this case the registration of each projection is performed using the interpolation of some chosen order. This means
that a some degree of smoothing is expected in the reconstruction due to explicit registration on each iteration of
the iterative alignment method. To enable this method set a registration parameter in Projection2dAlignment
plugin to True. You will also need to provide a registred projection data to the reconstruction plugin that follows.
2. An alignment using vector geometry (no explicit registration)
This implementation is better suited when the misalignment in projection space is not significant (could be even on the
subpixel scale).
The misalignment shifts will be calculated and passed automatically to the TomobarRecon3d reconstruction plugin afterwards.
Then reconstructionis performed using 3D vector geometry to compansate for suboptimal source/detector positions.
This approach is potentially faster and since no interpolation involved more accurate than the one above.
To enable this method set a registration parameter in Projection2dAlignment
plugin to False. Here you will need to provide an original raw data to the reconstructor as the shifts are being
passed with metadata automatically.
Important additional information
1. In order for the iterative alignment method to work, the raw projection data needs to be scaled in [0, 1] range.
This can be implemented by using the RescaleIntensity plugin after the loader.
2. The quality of iterative alignment (and the speed of convergence) depends on the reconstruction algorithm choosen. One can try
reconstruction_method to be SIRT3D, CGLS3D or FISTA3D in TomobarRecon3d reconstruction plugin. You might want
to consider denoising reconstruction CcpiDenoisingGpu3d if the FBP3D method is enabled.
3. The alignment error is printed in iterations in Projection2dAlignment plugin. It is a good practice to
watch the error behaviour in iterations. Ideally, the error should decrease in iterations, however, in practice
it can slightly increase. If the error goes very large very quick then there is a good chance
that the alignment doesn’t work and it is better to terminate the iterations.
Real data example
The example bellow shows a real ptychography data being iteratively aligned. The data has got large misalignment errors (projection shifts more than 50 pixels) and therefore the implementation 1 has been chosen. 20 iterations of the iterative algorithm have been performed to achieve the results bellow.